
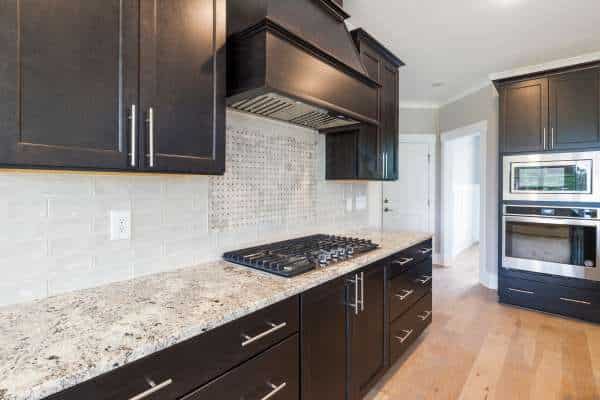
A meticulously finished caulking activity isn’t simply A completion but A cornerstone Of both the aesthetics And capability Of kitchen counters. Beyond its role in growing A seamless And polished look, Proper caulking performs A important function in keeping the structural integrity Of the countertop And surrounding areas. By sealing gaps And joints, Caulking prevents moisture infiltration, Thereby mitigating the chance Of water damage, Mold growth, How to caulk kitchen counter and ugly discoloration. Furthermore, A well-finished caulking activity contributes to the general cleanliness And hygiene Of the kitchen environment with the aid of getting rid of areas wherein dirt And debris can acquire. Beyond its practical blessings, Caulking additionally complements the durability Of the countertop, Reducing the chance Of steeply-priced repairs or replacements down the road.
Thus, Investing time And attention into well caulking kitchen counters no longer best elevates their visual appeal but also guarantees their sturdiness And capability for future years.
What Is Caulking, And Why Is It Necessary For Kitchen Counters?
Caulking is A bendy cloth, Usually made Of silicone or latex, Used to seal gaps And joints on numerous surfaces, Including kitchen counters. In the context Of work surfaces, Caulking serves more than one critical functions. Firstly, It creates A watertight seal alongside seams And edges, Preventing water from seeping into the gaps among the countertop And surrounding surfaces. This helps to defend in opposition to water harm, Mold growth, caulk kitchen counter, And the deterioration Of underlying substances.
Additionally, Caulking complements the aesthetics Of the kitchen by means of offering A clean And polished finish, Concealing imperfections, And creating seamless transitions among Different surfaces. Moreover, Caulking allows to enhance hygiene by way of sealing Off capability breeding grounds for bacteria And stopping the buildup Of dust And debris in difficult-to-reach crevices. Overall, Caulking is integral for preserving the integrity, Functionality, And visual appeal Of kitchen counters, Making it an critical element Of kitchen renovation And protection projects.
Can I Caulk Over The Existing Caulk On My Kitchen Counter?
While it is technically possible to sealant over existing caulk on your kitchen counter, It is generally not recommended for optimal results. Firstly, The new putty may not adhere properly to the old caulk, Resulting in A weaker bond And an increased likelihood Of peeling or cracking over time. Additionally, Caulk applied over old seal may not provide A smooth And seamless finish, As it can accentuate any imperfections or unevenness in the underlying surface.
Furthermore, Existing filler may harbor dirt, Mold, Or mildew, Which can compromise the effectiveness And appearance Of the new caulk. For best results, It is advisable to remove the old compound before applying new caulk to ensure proper adhesion, A clean surface, And A professional-quality finish. This can be done using a caulk remover, A utility knife, A sealant removal tool, caulk kitchen counter Followed by thorough cleaning And preparation Of the area before re-caulking.
1. Gather Tools And Materials
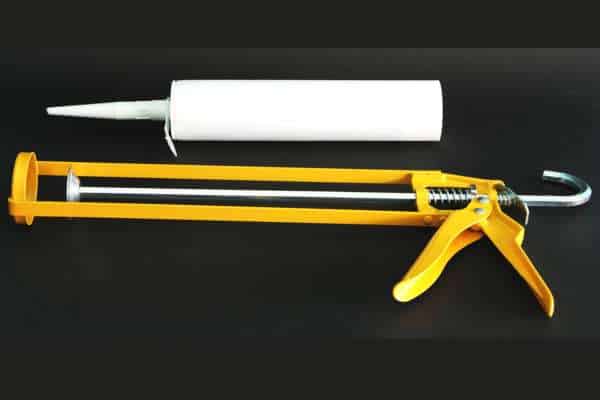
Before embarking on caulking kitchen counters, Assembling the necessary tools And materials is essential to ensure A smooth And efficient process. The primary tools required include A caulking gun, Which facilitates the controlled application Of caulk, caulk kitchen counter Ensuring precision And uniformity. Additionally, A utility knife proves invaluable for cutting the caulk tube tip to the desired angle, Allowing for the optimal bead width. A scraper is handy for removing old putty, Ensuring A clean And smooth surface for re-caulking.
In cases where old filler needs to be removed, Compound remover may be necessary to clean the area before reapplication thoroughly. Finally, A damp cloth is essential for smoothing the caulk bead And tidying up any excess for A professional finish. With these tools And materials at hand, Individuals can confidently tackle the task Of caulking kitchen counters with precision And efficiency, Ensuring both aesthetic appeal And functional durability.
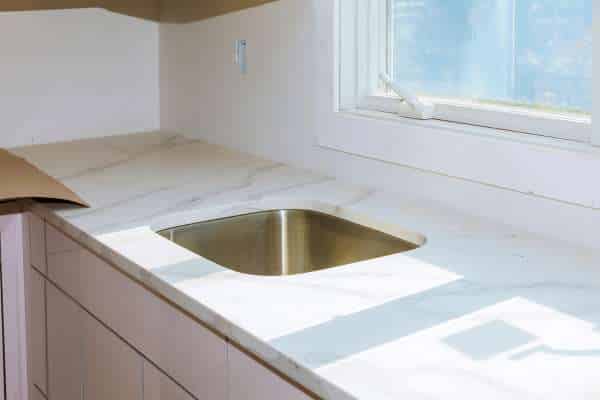
2. Assessing The Counter
Before starting up the caulking manner on kitchen counters, A thorough evaluation Of the present day country Of the floor is imperative to make certain an effective And long-lasting end result. Look for symptoms Of damage or put on, Such as cracks, Gaps, Or discoloration, Which may additionally compromise the integrity Of the seal. Pay specific interest to areas vulnerable to moisture exposure, Such as along seams or edges, Where caulking is vital for stopping water infiltration.
Additionally, Assessing the counter lets in for the components Of A comprehensive plan Of movement, together with any essential repairs or preparatory steps to make certain highest quality adhesion And Durability Of the new caulking. This proactive approach lays the foundation for A a hit caulking job, Ultimately improving both the appearance And Functionality Of the kitchen counter.
3. Preparing The Workspace
Preparing the workspace is A crucial preliminary step when embarking on the task Of caulking kitchen counters. To facilitate A smooth And efficient caulking process, It is essential to begin by clearing the counter Of any debris, Appliances, Or objects that may obstruct access to the caulking areas. Additionally, Applying masking tape along adjacent surfaces serves as A protective measure against the inadvertent spread Of excess caulk. By carefully affixing masking tape along the edges Of countertops, Walls, Or cabinets adjacent to the caulking areas, caulk kitchen counter Individuals can create clean, Crisp lines And prevent unsightly smudges or smears.
This simple yet effective precaution helps to maintain the overall cleanliness And integrity Of the surrounding surfaces, While also streamlining the cleanup process once the caulking is complete. By investing time in preparing the workspace adequately, Individuals set the stage for A successful caulking job, Ensuring professional-quality results And A visually appealing finish.
4. Removing Old Caulk
Before applying new caulk to kitchen counters, It’s imperative to remove any old caulking to ensure A clean And secure bond. Utilizing proper techniques for safe removal is essential to avoid damaging the surface. One effective method involves using A putty remover, Which softens the old seal, Making it easier to peel away. Apply the filler remover according to the manufacturer’s instructions, Allowing sufficient time for it to penetrate And loosen the caulking. Alternatively, A utility knife can be used to carefully score And cut away the old sealant and caulk the kitchen counter taking care to avoid scratching or gouging the countertop surface. Once the old caulk has been loosened away, Thorough cleaning is paramount to ensure optimal adhesion Of the new seal.
By employing these techniques, Individuals can effectively remove old caulk And prepare the surface for A seamless And long-lasting caulking job, Ensuring both aesthetic appeal And functional durability in the kitchen.
5. Cutting The Caulk Tube
Achieving the correct cut on the tip Of the caulk tube is essential for precise and controlled application Of caulk when sealing kitchen counters. To begin, Select the desired angle for the cut based on the width Of the bead required for the caulking job. For narrower beads, A smaller angle should be chosen, While wider beads may necessitate A larger angle. Take care to avoid cutting too much off the tip, As this can result in A wider bead than desired.
The goal is to create an opening that is sized appropriately for the desired bead width, caulk kitchen counter Allowing for precise application And minimal waste. By following these instructions And taking care to cut the caulk tube tip at the correct angle, Individuals can achieve professional-quality results when caulking kitchen counters, Ensuring A neat And uniform finish that enhances both the appearance And functionality Of the space.
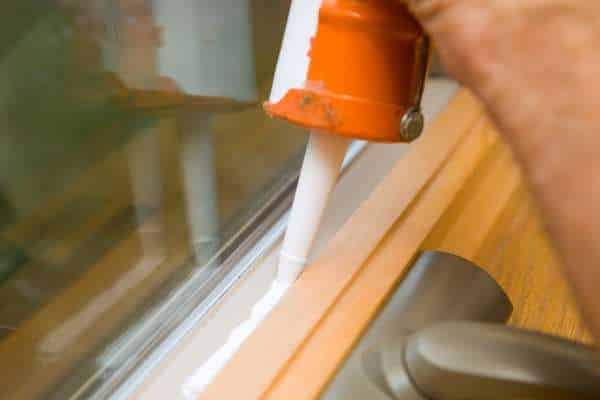
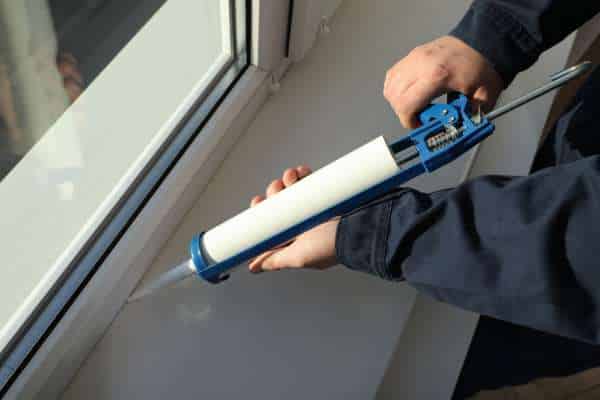
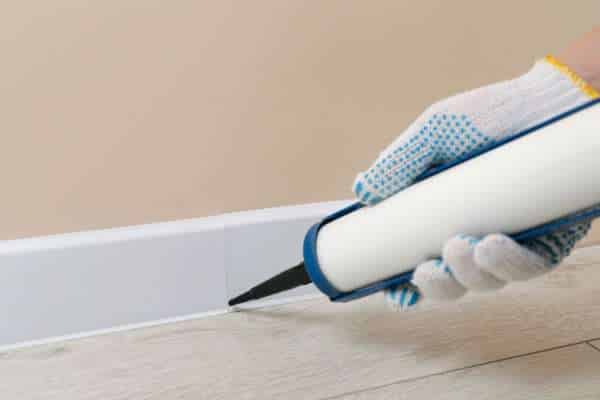
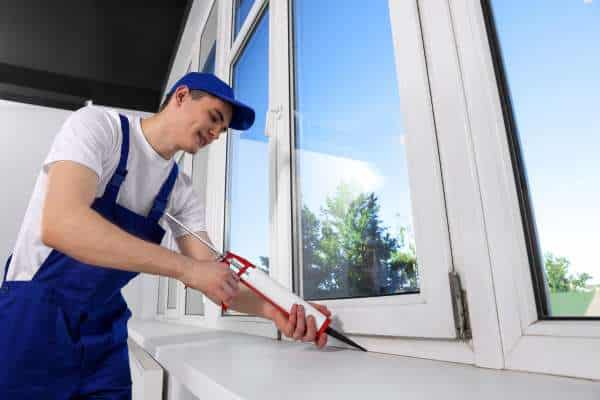
6. Applying Caulk
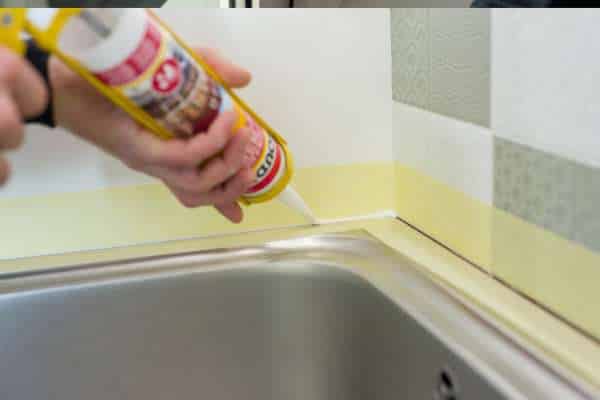
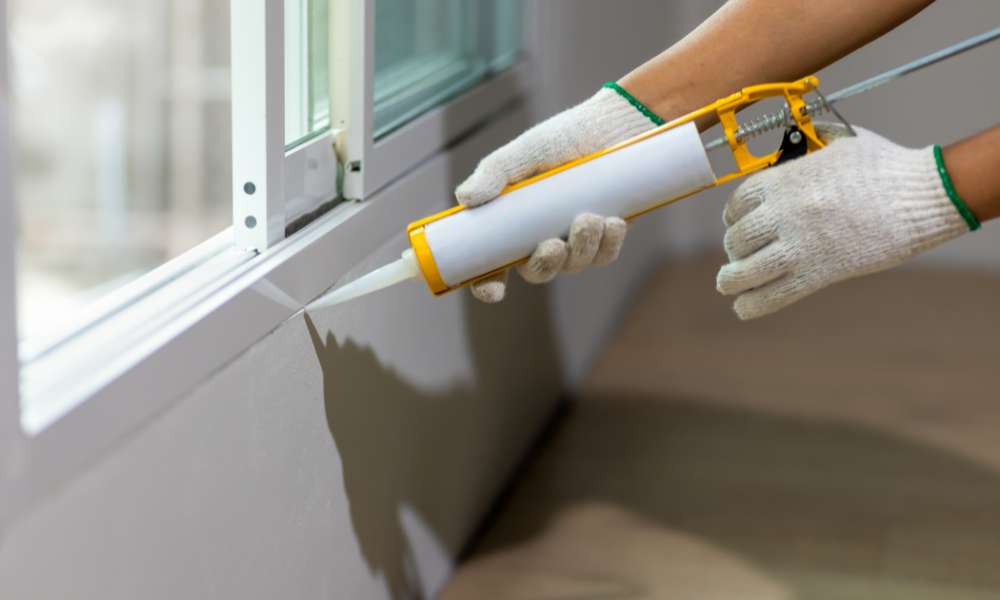
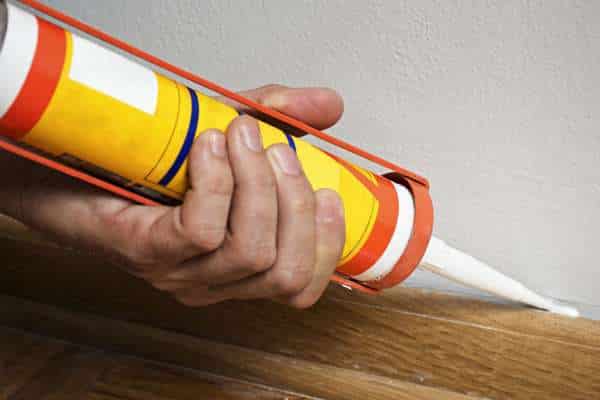
Mastering the art Of applying caulk is essential for achieving professional results when sealing kitchen counters. Proper technique begins with holding And operating the caulking gun with precision And control. Grip the gun firmly but comfortably, Positioning it at A slight angle to the surface to be caulked. Squeeze the trigger gently And steadily to initiate A smooth flow Of caulk. As you move the gun along the edge, Maintain A consistent pace to ensure even application.
Applying steady pressure on the trigger helps regulate the flow Of caulk, Preventing gaps or unevenness in the bead. Aim to maintain A uniform bead thickness throughout the caulking process, Adjusting the speed And pressure as needed to achieve optimal results. By mastering these techniques And practicing A steady hand, individuals can confidently tackle caulking projects with ease, Achieving seamless And professional-looking seals that enhance the appearance And durability Of kitchen counters.
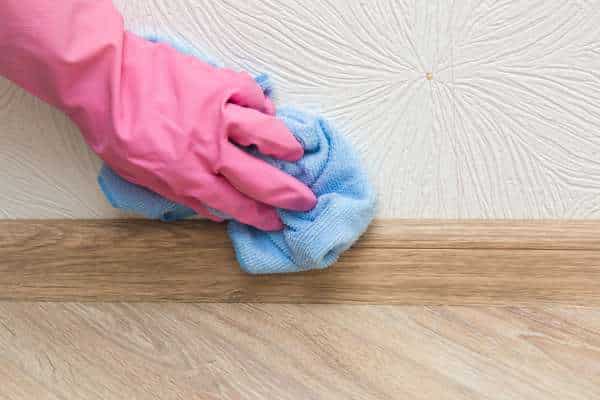
7. Smoothing The Caulk
After applying caulk to kitchen counters, Achieving A clean And professional finish is essential for both aesthetic appeal And durability. Smoothing the caulk bead is the final step in the caulking process And requires careful attention to detail. One method for smoothing the caulk bead is to use A damp cloth or sponge. Dip the cloth or sponge in water And gently run it along the caulk line, Applying light pressure to flatten And smooth the bead. Dip your finger in water And carefully run it along the caulk line, Applying gentle pressure to mold the caulk into A uniform shape. Take care to wipe away any excess caulk or water to achieve A clean And tidy finish. By employing these methods And paying close attention to detail, individuals can ensure A professional-looking caulk line that enhances the appearance And longevity Of kitchen counters.
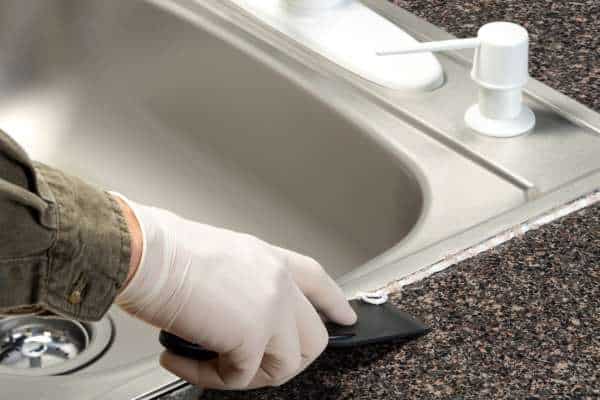
8. Removing Excess Caulk

Removing excess caulk is A crucial step in achieving A clean And polished finish when caulking kitchen counters. To effectively scrape away excess caulk, Utilizing the right tools And techniques is essential. A scraper or utility knife can be employed for this purpose, Providing precision And control to remove unwanted caulk without damaging the surrounding surfaces. When using A scraper or knife, Hold it at Aa shallow angle to the surface And gently glide it along the caulk line, taking care not to apply too much pressure.
This allows for the precise removal Of excess caulk while minimizing the risk Of scratching or gouging the countertop. Wipe away stray caulk with A damp cloth or sponge, Being careful not to disturb the freshly applied caulk. By following these tips And techniques, Individuals can achieve A clean And professional-looking finish that enhances the appearance And functionality Of their kitchen counters.
9. Allowing Time To Dry

Allowing sufficient time for caulk to dry and cure is paramount to ensure A successful caulking job And maximize its effectiveness. While the drying time can vary depending on factors such as humidity And temperature, it’s essential to follow the manufacturer’s recommendations for the specific caulk being used. Rushing the drying process can compromise the integrity Of the seal And lead to premature failure, Necessitating reapplication.
During this critical period, It’s crucial to avoid any contact with the freshly applied caulk to prevent smudging or disruption Of the seal. Refrain from touching or disturbing the caulk bead, And avoid using the countertop or sink until the caulk has fully cured. By allowing ample time for the caulk to dry And cure undisturbed, You can ensure A durable And long-lasting seal that effectively protects your kitchen counters against moisture And wear.
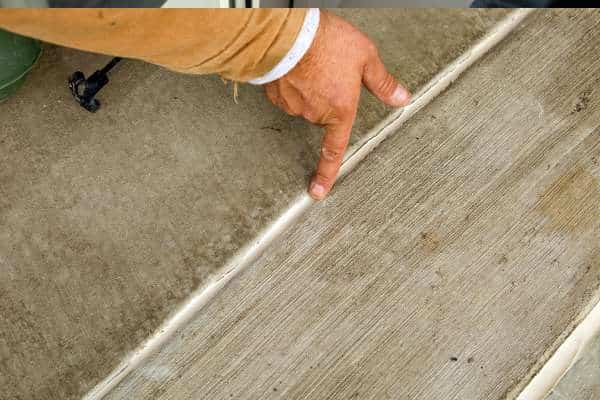
10. Inspecting The Finished Caulk
Thoroughly inspecting the finished caulked areas is A crucial step in ensuring the effectiveness And durability Of the caulking job. Take the time to carefully examine the caulked seams And edges for uniformity And completeness, Checking for any gaps, unevenness, Or imperfections. Use A keen eye to assess the quality Of the caulking job, Ensuring that the caulk bead is smooth, Consistent, And properly adhered to the surface. Address any areas that may require touch-ups or additional caulking to achieve A seamless finish. Utilize A damp cloth or sponge to gently wipe away any excess caulk or smudges, taking care not to disturb the freshly applied caulk.
By conducting A thorough inspection And addressing any imperfections promptly, You can ensure that your caulking job meets high standards Of quality And provides long-lasting protection for your kitchen counters against moisture And wear.
11. Cleaning Up
As the final step in the caulking process, Proper cleanup ensures A polished finish And leaves your workspace pristine. Begin by carefully removing any masking tape that was applied to protect adjacent surfaces during caulking. Peel it away slowly And steadily to avoid damaging the newly caulked areas or leaving behind any residue. Next, Meticulously clear the workspace Of any remaining debris or caulking materials, Using A brush or damp cloth to ensure thoroughness. By attending to these details, You not only enhance the aesthetic appeal Of your kitchen but also demonstrate A commitment to craftsmanship And attention to detail. A clean And tidy workspace not only elevates the overall appearance Of your kitchen but also signifies the completion Of A job well done, Leaving you with A sense Of satisfaction And pride in your handiwork. Accessorizing A kitchen counter can enhance its functionality And aesthetic appeal.
12. Final Inspection
The final inspection is A critical step in the caulking process, Ensuring that the quality And durability Of the job meet the highest standards. Take the time to meticulously verify the integrity Of the caulking job by examining all seams And edges for proper sealing. Run your fingers along the caulked areas to feel for any gaps or unevenness, And visually inspect the caulking bead for consistency And completeness. Address any areas that may require touch-ups or additional caulking to ensure A seamless And watertight seal. By conducting A thorough final inspection, You can have confidence in the long-lasting performance Of your caulking job, Knowing that your kitchen counters are effectively protected against moisture And wear.
Additionally, This attention to detail demonstrates your commitment to excellence And craftsmanship, Leaving you with A sense Of pride And satisfaction in A job well done.
13. Maintenance Recommendations

To maintain the integrity Of the caulking over time And ensure continued protection for your kitchen counters, It’s essential to implement A proactive maintenance routine. Regularly inspect the caulking for signs Of wear, Such as cracks, Gaps, or discoloration, And address any issues promptly to prevent water infiltration And damage. Depending on factors such as usage And environmental conditions, it’s advisable to inspect the caulking at least once or twice A year, Frequently if needed. Additionally, Consider re-caulking areas that are subject to heavy use or exposure to moisture, Such as around sinks or countertops, To maintain optimal sealing performance. When re-caulking, Thoroughly clean And prepare the surface to ensure proper adhesion And longevity Of the new caulking.
By staying vigilant And proactive in your maintenance efforts, You can prolong the lifespan Of your caulking And preserve the beauty And functionality Of your kitchen counters for years to come.
What Type Of Caulk Should I Use For Caulking Kitchen Counters?
Selecting the right type Of caulk is crucial for effectively caulking kitchen counters And ensuring long-lasting results. Silicone caulks create A waterproof seal that effectively prevents water penetration, making them ideal for use in areas prone to splashes And spills, Such as culinary surfaces. Additionally, Silicone caulks adhere well to A variety Of surfaces, Including tile, Stone, Laminate, And metal, Ensuring A secure And long-lasting bond. When choosing silicone caulk for caulking kitchen counters, Opt for A product specifically designed for kitchen And bath applications, As these are formulated to withstand the humid And high-moisture environments typically found in kitchens. Look for caulks labeled as “mold-resistant” or “mildew-resistant” for added protection against fungal growth.
By selecting A high-quality silicone caulk designed for kitchen use, You can ensure A durable And effective seal that preserves the integrity And appearance Of your cooking surfaces for years to come.
How Long Does It Take For Caulk To Dry On Kitchen Counters?
The drying time Of caulk on kitchen counters can vary depending on several factors, including the type Of caulk used, Environmental conditions, And the thickness Of the caulk bead. In general, Most caulks will form A skin or dry to the touch within 30 minutes to an hour after application. Silicone caulks, For example, typically require 24 to 48 hours to fully cure And achieve their maximum strength And durability. During this curing period, It’s crucial to avoid any contact with the freshly applied caulk to prevent smudging or disruption Of the seal.
Additionally, Factors such as humidity And temperature can affect the drying And curing time Of caulk, So it’s advisable to follow the manufacturer’s recommendations for the specific product being used And allow ample time for the caulk to dry And cure completely before resuming normal use Of the kitchen counters.
Conclusion
The significance Of effectively caulking kitchen counters cannot be overstated. Beyond mere aesthetics, A well-caulked kitchen counter plays A pivotal role in maintaining the functionality And Durability Of the space. By sealing gaps And joints, caulking prevents moisture infiltration, Mitigating the risk Of water damage, Mold growth, And unsightly discoloration. Following the outlined steps for A successful caulking job is essential to ensure A seamless And watertight seal that protects your cooking surfaces for years to come. Furthermore, The transformative impact Of A well-caulked kitchen counter extends beyond functionality, Enhancing the overall aesthetics Of the space.
A clean And polished finish not only elevates the visual appeal Of the kitchen but also creates A more hygienic And inviting environment for cooking And entertaining. By investing time And effort in effectively caulking kitchen counters, You can enjoy the enduring benefits Of A beautiful And functional space that enhances your daily life.