

Replace a Kitchen Faucet is a relatively simple task, that can be completed in about an hour, using only a few basic tools. The first step is to remove the old faucet from the sink. Once the faucet is free, disconnect the water supply lines and remove the faucet from the sink.
The new faucet should then be installed in reverse order, securing it to the sink with nuts and reconnecting the water supply lines. Be sure to check for leaks before replacing any of the cabinet hardware or fittings.
1. Reason for kitchen faucet replacement
When it’s time to replace a kitchen faucet, there are many factors to consider. Some people choose to replace their faucets based on appearance while others may need to replace a faucet because it is leaking or outdated. The first step is removing the old faucet. This can be done by turning off the water supply and disconnecting the hoses from the faucet. Once the hoses have been disconnected, the screws that hold the faucet in place can be removed.
See More: How To Operate A Microwave
2. Types of kitchen faucets

There are three types of kitchen faucets: the single-hole, the two-handle, and the pull-out. The single-hole is the simplest and most common type. It has one spout and one handle. The two-handle is less common, but it can be more convenient if you need to adjust water temperature and pressure separately. The pull-out is the most versatile type; it has a retractable hose that lets you reach all areas of your sink.
If you’re ready to replace your kitchen faucet, first decide which type you want. Then remove the old faucet by following these steps:
- Turn off the water supply to your kitchen sink at the main valve.
- Disconnect the water lines from the faucet using adjustable pliers.
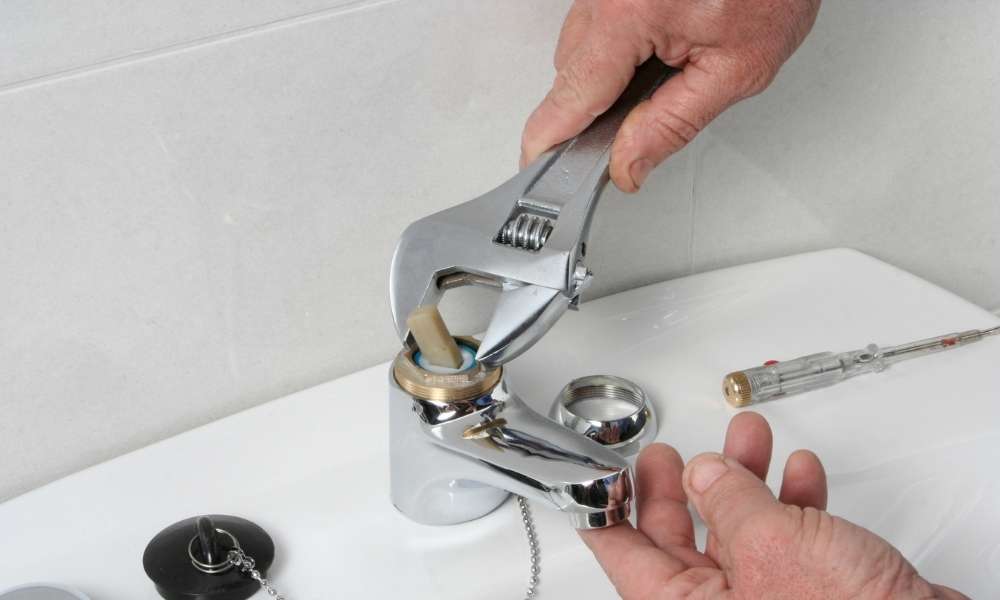
3. Necessary tools: screwdriver, wrench, pliers
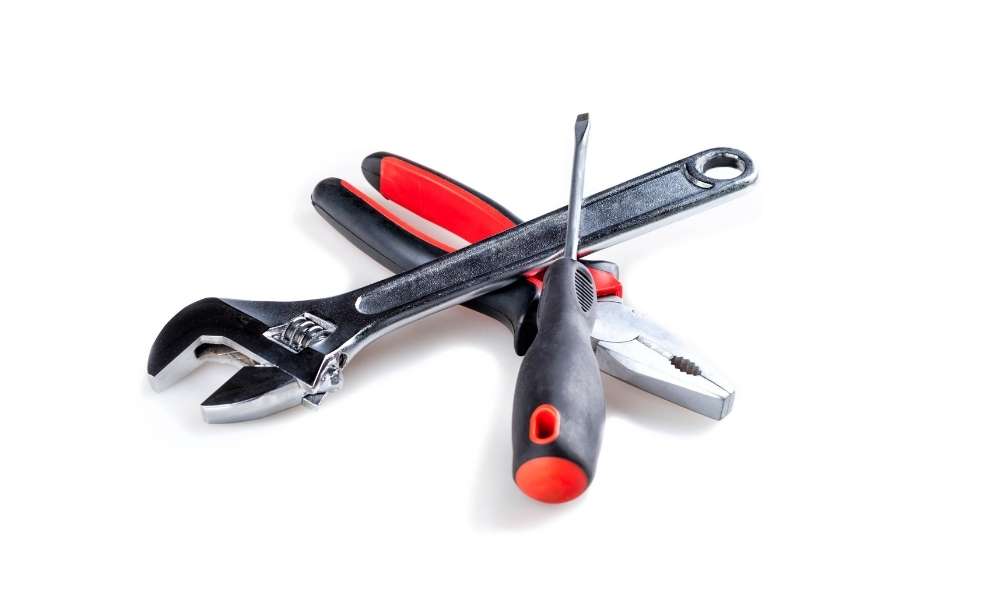
Replacing a kitchen faucet may seem daunting, but with the right tools, it’s a breeze. A screwdriver, wrench, and pliers are necessary to complete the job. Remove these screws with a screwdriver and set them aside.
Next, loosen the nuts securing the faucet to the sink with a wrench. There is usually one at the base of the faucet and one near the top. If they are hard to get to, use pliers to grip them. Once the nuts are loose, pull out the old faucet and set it aside.
Rinse off any dirt or debris that may have accumulated in the sinkhole and insert the new faucet. Secure it in place by tightening the nuts with a wrench.
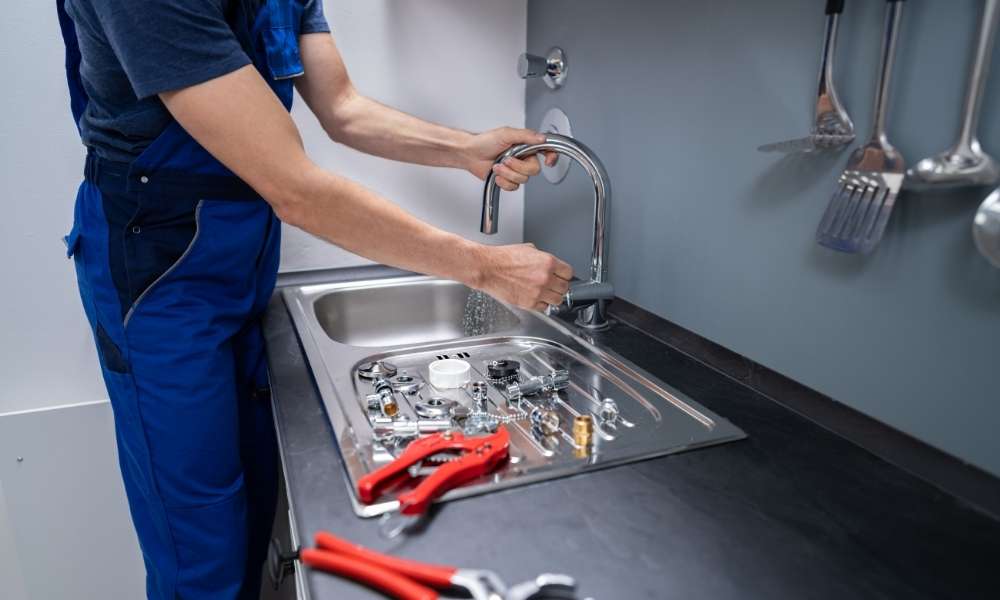
4. How to remove a kitchen faucet
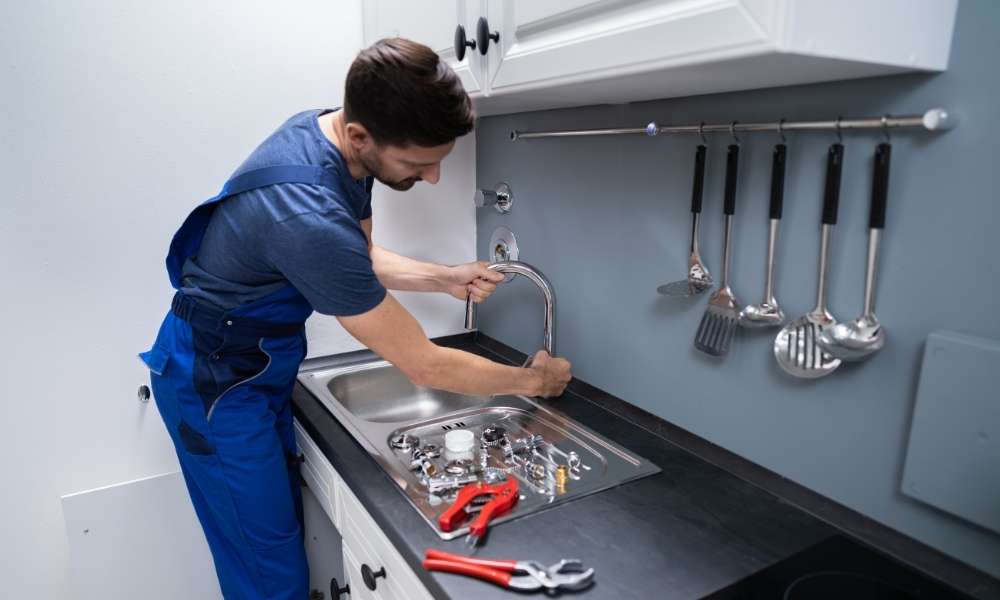
Removing a kitchen faucet is not as difficult as one might think. The most important part of the process is to make sure that you have all of the necessary tools and parts before you start.
The first step is to turn off the water supply to the faucet. This can usually be done by turning a shut-off valve located underneath the sink. Once the water is turned off, disconnect the hoses from the faucet by unscrewing them counterclockwise.
Next, remove the screws that hold the faucet in place. There may be one or two screws, depending on the model of the faucet.
5. Remove the aerator

Replacing a kitchen faucet is a relatively simple task that can be completed in about an hour, using basic tools. The first step is to remove the aerator. The aerator is the small screen at the end of the faucet that mixes air with the water stream. Be sure to check for leaks before replacing any other parts of the faucet.
6. Remove the handle

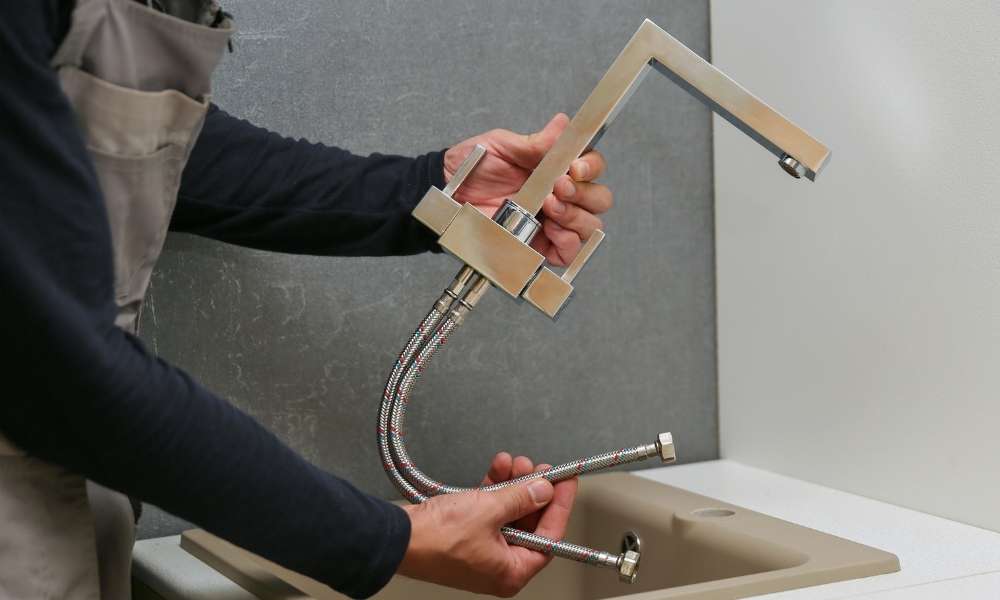
Depending on the faucet model. The first step is to remove the old faucet by unscrewing the mounting nuts with a wrench. Next, disconnect the water supply hoses by unscrewing the compression fittings. The old faucet can then be pulled out and replaced with the new one by reversing these steps. Be sure to apply Teflon tape or pipe dope to the threads of the new faucet before installing it, in order to prevent leaks.
7. Open the call from sync
The most important thing to remember is to open the call from sync before beginning the installation. The first step is to shut off the water supply to the faucet. There are usually two valves located under the kitchen sink – one for hot water and one for cold water. There are usually two types of screws that hold the faucet in place – Phillips head screws and slider screws.
8. How to install a new kitchen faucet
If you’re like most homeowners, your kitchen faucet is one of the first things you’ll want to upgrade when renovating your kitchen. Replacing a kitchen faucet is a do-it-yourself project that can be completed in as little as 30 minutes. Here’s how to install a new kitchen faucet:
- Shut off the water supply to the faucet by turning off the valve under the sink.
- Remove the old faucet by unscrewing the mounting nuts from the deck or countertop.
- If necessary, use a basin wrench to loosen the supply lines from the faucet body.
- Install the new faucet by reversing step 2 and screwing on the mounting nuts until they are tight.
9. Reconnect the handle and aerator

Replacing a kitchen faucet is a task that many homeowners can do on their own. To reconnect the handle, first, make sure that the new faucet is in the correct position. There should be an indentation on the base of the faucet where it meets up with the countertop; ensure that this area lines up with the hole in your countertop. With one hand, hold onto the faucet and twist it into place with your other hand; you may need to use a wrench or pliers to get it tight.
10. Describe the process of replacing a kitchen faucet

The first step is to remove the old faucet by loosening the screws that hold it in place. Next, disconnect the water supply lines and remove the old faucet. Finally, turn on the water and check for any leaks.
11. Necessary equipment

Necessary equipment to Replace a Kitchen Faucet is a necessary task, but it’s not difficult. Here are the tools and supplies you’ll need to get the job done:
- Wrenches – adjustable and standard size
- Screwdriver
- Channel locks or pliers
- Teflon tape
- Pipe dope
- Basin wrench
- New faucet kit
To begin, shut off the water supply to the faucet by turning off the valves under the sink. Next, remove the old faucet. Once the faucet is free, disconnect the water supply lines by unscrewing them or using channel locks or pliers to twist them off.
See More: How to Draw a Kitchen
Conclusion
Replacing a kitchen faucet is a task that most homeowners can complete in less than an hour, with just a few basic tools. In this article, we will walk you through the steps necessary to replace your kitchen faucet.
First, remove the old faucet by loosening the screws that hold it in place. Be sure to save the screws, as you will need them to install the new faucet. Next, disconnect the water lines from the faucet. There should be one line for hot water and one line for cold water. Now it’s time to install the new faucet. Begin by attaching the water lines to the new faucet.