Imagine stepping out into your garden on a warm summer season day and playing with the sensation of water cascading over you underneath the open sky. An outside bath provides detail of luxury in your outdoors, whether or not it is for rinsing off after a swim, washing away garden filth, or truly experiencing the joy of bathing in nature. Installing an outside bathe might sound like a complicated venture, but with a little steering, even novices can create their own private oasis. This manual will walk you through every step, from planning to completing touches, making sure your Install An Outdoor Shower is functional and exquisite.
1. Finding the Perfect Spot for Your Outdoor Shower

Selecting the proper area for your outdoor bathing is pivotal to its fulfillment. Ideally, you need a gap that is both non-public and reachable. Consider proximity to your private home’s plumbing to simplify the setup manner. The spot ought to offer enough drainage and not be too close to plants or grass, that can become oversaturated. It’s critical to think about solar publicity too—a sunny location can help keep the space heat and dry, decreasing mold and mildew buildup. Remember to balance aesthetics with practicality as you envision how the bath will combine with your outdoor area.
2. Choosing Between a Fixed or Portable Outdoor Shower
One of the first decisions you’ll need to make is whether you want a fixed or portable outdoor shower. Fixed showers are permanent installations, often connected to your home’s plumbing, and can be more elaborate in design. Portable showers, on the other hand, are easier to set up, often utilizing simple hoses or solar bags, and can be moved around as needed. Consider how much use your shower will get and whether a temporary or permanent solution makes more sense for your lifestyle. For some, the convenience of a portable option outweighs the sturdiness of a fixed one.
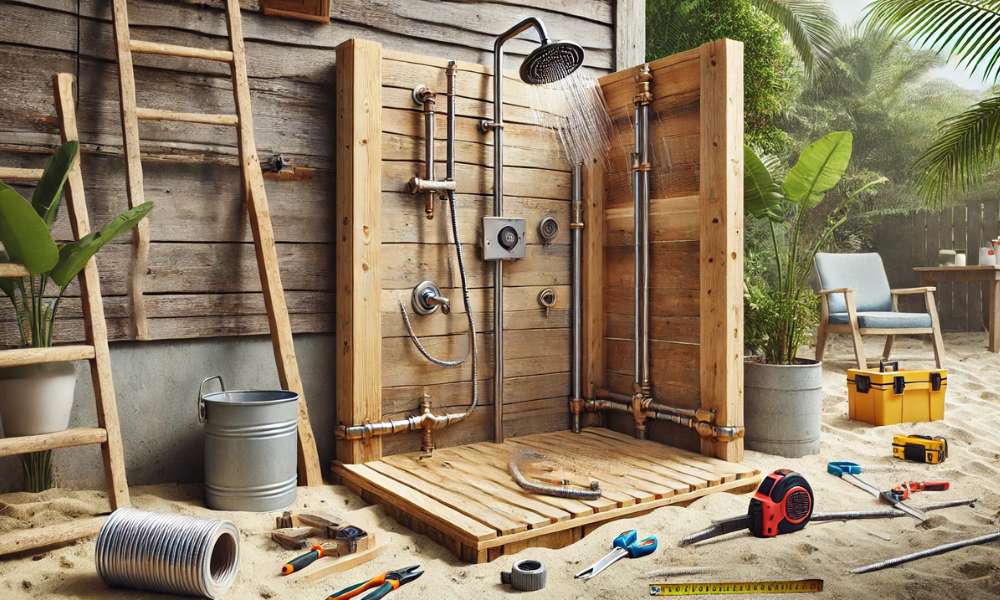
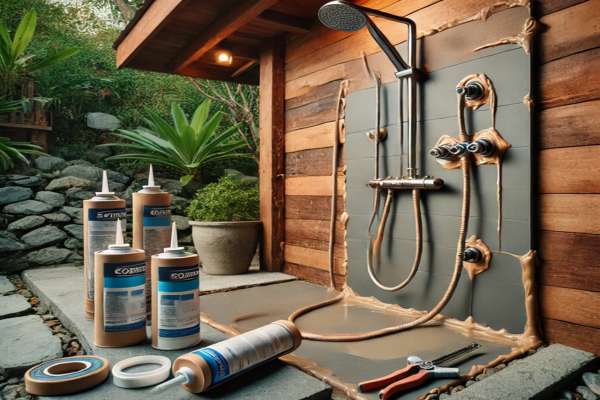
3. Essential Tools and Materials for Installing an Outdoor Shower
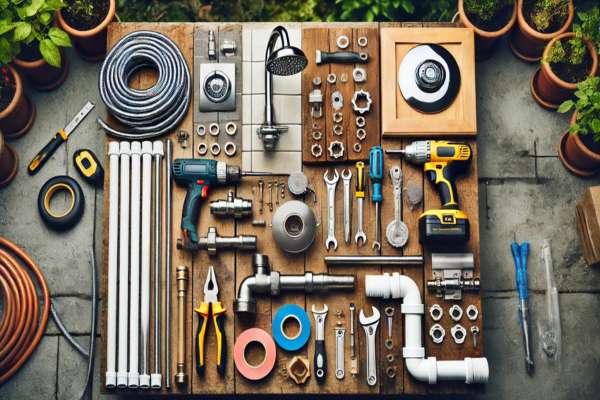
Install An Outdoor Shower To correctly deploy an outside shower, you’ll need loads of gear and materials. Basic plumbing equipment inclusive of a pipe wrench, Teflon tape, and adjustable pliers is crucial. You’ll also need piping, a showerhead, and probably a mixer if you plan on installing each warm and bloodless water line. Don’t overlook climate-resistant screws, outside-rated fixtures, and waterproof sealant to ensure your setup withstands the elements. It’s critical to have all substances accessible earlier than you begin so that you can complete the undertaking without useless delays.
4. The Importance of Drainage: How to Manage Water Runoff

One factor that is frequently neglected at some point of setup is the way to control water runoff. Poor drainage can result in pooling water, which can also damage nearby plants or create muddy patches in your yard. An easy answer is to put gravel beneath the shower to allow water to filter via the ground obviously. Alternatively, you could direct water runoff right into a drainage pipe or maybe a rain lawn. Planning your drainage approach from the start will prevent headaches later and help defend your lawn and your shower setup.
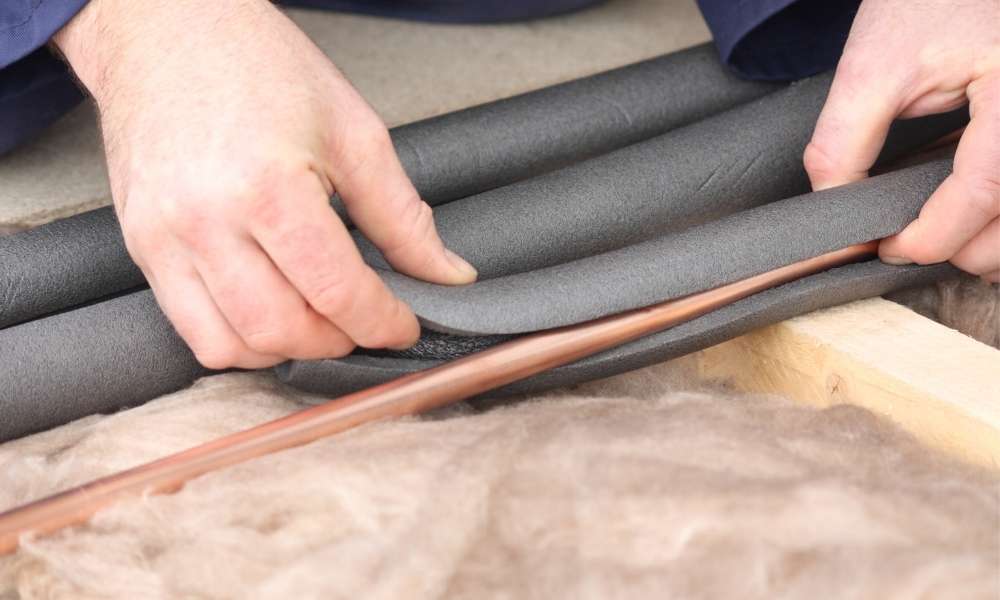
5. Connecting to an Existing Water Supply: Simple Plumbing Tips
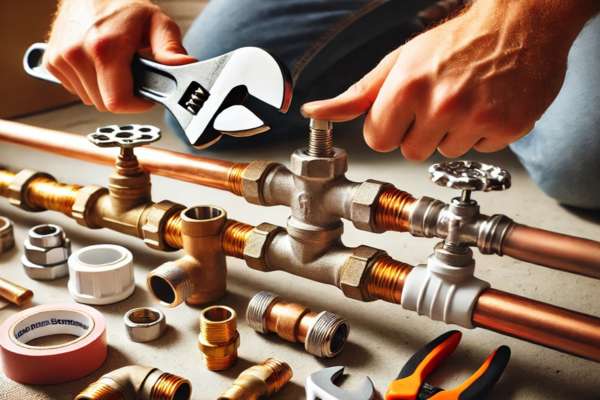
If you’re connecting your outdoor shower to your home’s existing water supply, basic plumbing skills will come in handy. Most outdoor showers can connect directly to your garden hose or an outdoor spigot. However, if you’re aiming for a more permanent installation, running new pipes from your home’s main water line might be necessary. Be sure to shut off the water supply before starting, and use Teflon tape to prevent leaks at the joints. With the right approach, connecting to an existing water supply can be straightforward and stress-free. Install An Outdoor Shower.
6. Exploring Showerhead Options: From Basic to Luxe

The showerhead you select will significantly affect the appearance and experience of your outside bath. For a country, minimalist vibe, remember a simple hand-held nozzle. If you’re going for a more spa-like revel in, choose a rainfall showerhead or one with more than one spray setting. Stainless metal or brass showerheads generally tend to resist outside conditions better, offering sturdiness alongside aesthetics. Your desire needs to reflect the general design of your outdoor space whilst making sure of lengthy-lasting performance below numerous climate conditions.
7. Installing a Solar Shower: Eco-Friendly and Energy-Efficient
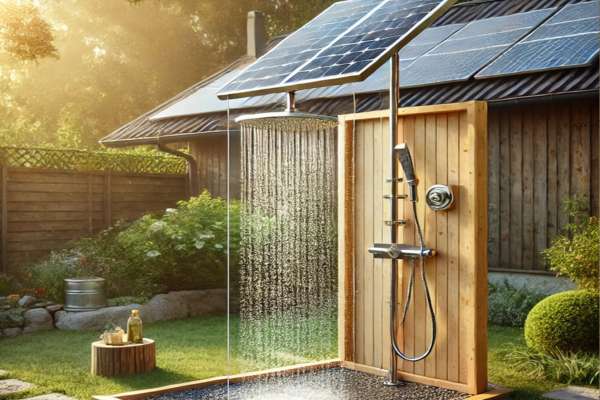
Install An Outdoor Shower For the eco-conscious gardener, a solar bath is a fantastic preference. Solar showers use the sun’s power to warm water, doing away with the want for fuel or energy. They commonly include a solar panel or a black reservoir that absorbs heat all through the day. This environmentally pleasant choice is not simplest easy to install but additionally saves on power fees. Solar showers work first-class in sunny regions, so placement is prime. If you live in cooler weather, you could need to don’t forget a backup heating option for cloudy days.
8. Adding Privacy: Creative Solutions for Outdoor Shower Enclosures
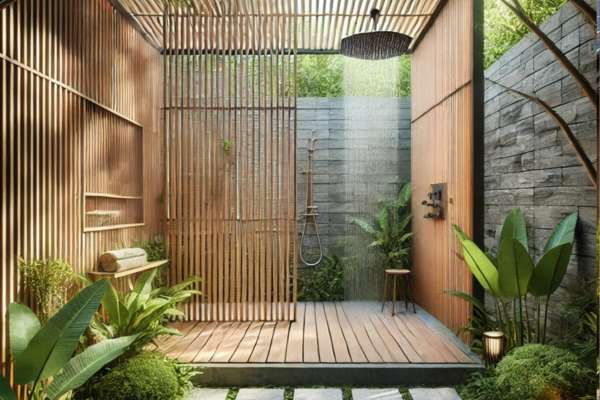
While the idea of an outside bathe is invigorating, privateness is mostly a situation. Luckily, there are masses of creative solutions for enclosing your shower area. Bamboo screens, lattice partitions, or tall hedges offer herbal, rustic options that mix seamlessly with the outside. For an extra cutting-edge appearance, you may use frosted glass panels or wood slats. The intention is to create a sanctuary that feels open yet personal. Adding privacy elements also improves the overall aesthetic of your outdoor shower, making it a greater fun and practical characteristic.
9. DIY vs. Professional Installation: What’s Right for You?
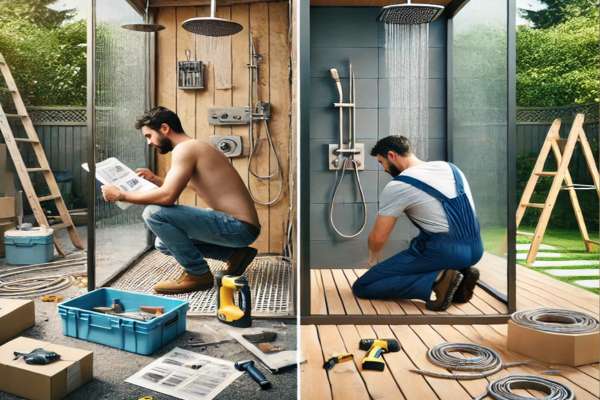
Before diving into this mission, it’s crucial to evaluate whether you should tackle the setup yourself or hire a professional. If you’re comfortable with fundamental plumbing and feature experience with home projects, a DIY installation may be each rewarding and value-effective. However, if you’re planning a greater complex setup—like connecting hot water or including difficult drainage systems—a professional may be really worth the investment. Balancing cost with the level of difficulty will assist you decide the exceptional path for your task.
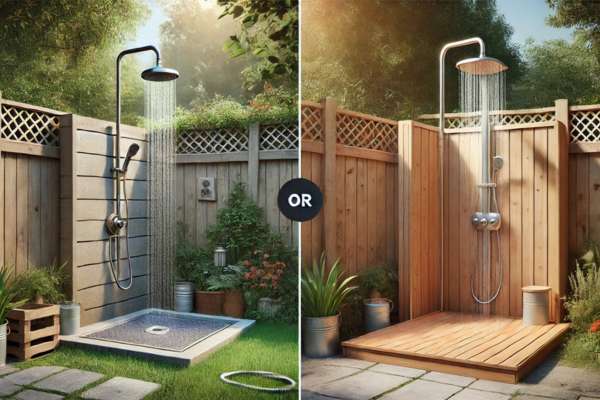
10. Building a Strong and Stable Shower Base
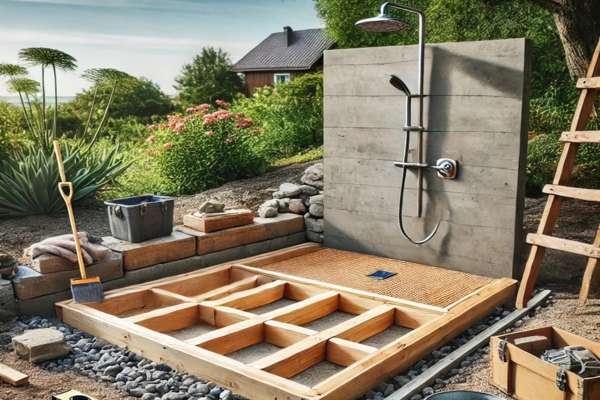
A strong bathe base is essential for both safety and longevity. Depending on your aesthetic choices, you could construct a timber deck, lay down stone pavers, or pour a concrete slab. Make sure the floor is slip-resistant and might resist publicity to water through the years. A stable base will no longer most effectively guide your bathing but additionally assist with drainage. Consider sloping the bottom slightly to ensure water flows far away from the bathing vicinity, maintaining it dry and clean after use.
11. Incorporating a Hot Water Option: What You Need to Know
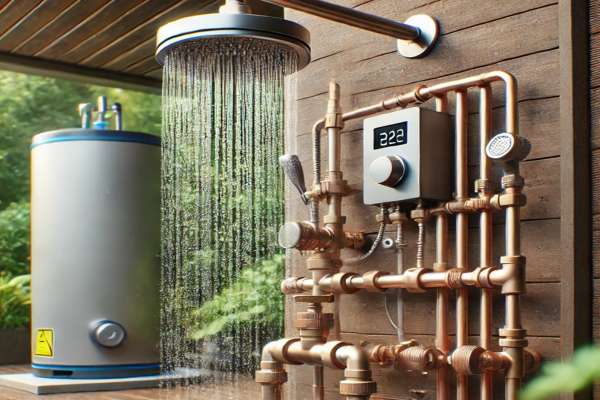
An out-of-door shower with warm water adds a luxurious touch, especially for cooler days. To contain a warm water alternative, you’ll want to connect your shower to both warm and bloodless water lines. This requires more superior plumbing paintings, but the payoff is well worth it. Installing a thermostatic blending valve is crucial for regulating the water temperature and preventing scalding. Hot water systems may be powered by your home’s present heater or through a committed tankless water heater, presenting a cushy and spa-like revel.
12. Weatherproofing Your Outdoor Shower: Tips for Durability
Since your outside bathe might be uncovered to the factors, weatherproofing is vital. Choose materials that could handle solar, rain, and wind without degrading—like chrome steel, dealt with timber, or concrete. Use outdoor-grade furnishings and practice water-resistant sealants on joints and surfaces to prevent water harm. Covering your shower all through iciness months or in harsh weather situations can make its lifespan and reduce wear and tear. Proper weatherproofing will make certain your out-of-doors shower stays a practical and stylish addition for future years.
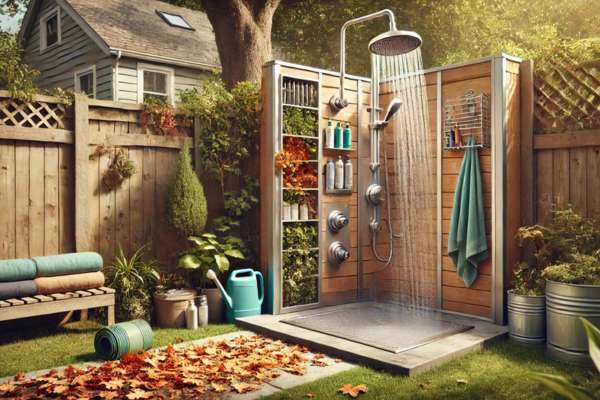
13. Accessorizing Your Outdoor Shower: Hooks, Shelves, and More

Install An Outdoor Shower To beautify the capability of your outside bath, recall adding add-ons like hooks for towels, cabinets for cleaning soap, and even a small bench for seating. These little touches can make a big difference in how you operate the space. Opt for chrome steel or different rust-resistant substances to ensure durability. You could also add decorative elements like planters or outdoor rugs to create extra inviting surroundings. Personalizing your outdoor shower with considerate add-ons can transform it into a true retreat.
14. Maintaining Your Outdoor Shower Year-Round
Regular upkeep is fundamental to retaining your outdoor bathing in pristine condition. Check for leaks periodically, in particular around the joints and connections. Clean the showerhead to cast off mineral buildup, and make sure drainage regions stay loose from debris. In less warm climates, it’s critical to winterize your shower by draining any final water from the pipes to save you from freezing. Taking these steps will help you bathe bear season after season with minimum put on.
15. Troubleshooting Common Outdoor Shower Issues and Fixes
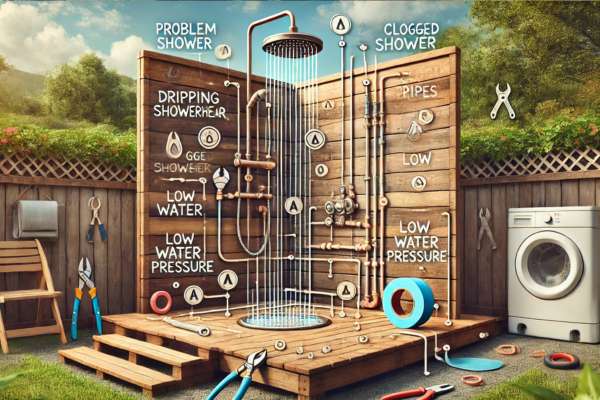
Even with the best installation, issues may arise. Common problems include low water pressure, clogged showerheads, or leaks in the plumbing. For low water pressure, inspect your hoses and pipes for kinks or blockages. A clogged showerhead can often be fixed by soaking it in a vinegar solution to dissolve mineral deposits. Leaks usually occur at the joints, and a simple application of Teflon tape or tightening of connections should do the trick. Knowing how to troubleshoot these common issues can keep your shower running smoothly with minimal effort.
Conclusion
Install An Outdoor Shower can be a transformative undertaking, turning your garden right into a multifunctional area for relaxation and refreshment. By following those steps and being attentive to both practical and aesthetic information, you can create a lovely and purposeful shower that complements your outdoor environment. With a bit of making plans, a few primary equipment, and a sprint of creativity, you’ll quickly be enjoying the correct combo of nature and luxury for your personal outside.