
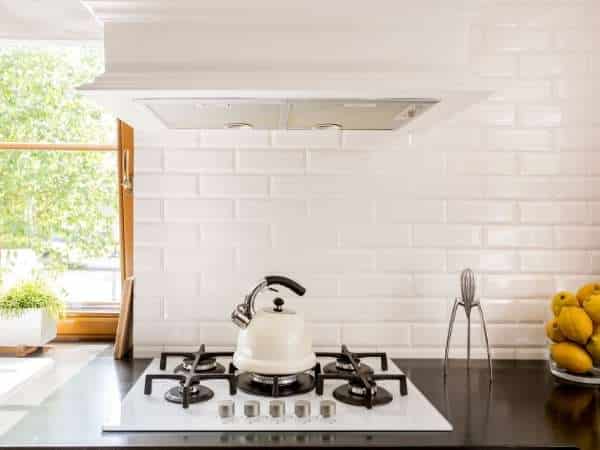
Install Kitchen Backsplash On Drywall is a quick and easy manner to add a few fashion in your kitchen. There are many special kinds of materials you could utilize for a kitchen backsplash, which include tile, stone, and metal. Before you start installing your kitchen backsplash, be sure to measure the location and buy the suitable amount of fabric.
1. Measure The Wall

Be sure to buy enough tiles to cover the entire area. The adhesive should be applied to the back of the tiles before they are installed. Be sure to follow the manufacturer’s instructions for applying and drying time. The tiles can then be installed using a tile saw or wet saw. Start in one corner and work your way across the wall, fitting the tiles together like a puzzle. Be careful not to get any adhesive on the front of the tiles. Allow plenty of time for the adhesive to dry before cooking in the kitchen.
2. Prepare The Walls For Tile
If you are installing kitchen backsplash on drywall, be sure to prepare the walls first. Use a level to ensure the surface is even and then use a tape measure to mark the dimensions of your backsplash. Draw a level line on the wall using a pencil and then use a straight edge to create your tile lines. You may also want to use spacers between the tiles to create even gaps. Apply thin-set mortar to the wall using a trowel and then press the tiles into place. Be sure to follow the manufacturer’s instructions for spacing and grouting. Allow the mortar to completely dry totally before applying sealant.
Remove Outlets And Covers
Installing a kitchen backsplash is a outstanding manner to enhance the look of your kitchen and guard your walls from spills and splatters. One essential element to take into account while installing a kitchen backsplash is to remove all of the shops and covers from the wall wherein the backsplash can be established. This will make certain that the backsplash is properly installed and that there are not any gaps among the backsplash and the wall.
Fix Wall Imperfections
Adding a kitchen backsplash is a great way to fix wall imperfections and protect your walls from spills and splatters. If you’re installing a kitchen backsplash on drywall, here are a few tips to help you get the job done right:
- Measure the area where you want to install the backsplash and purchase tile that is the correct size.
- Spread a layer of mortar over the surface of the wall using a trowel. The mortar should be about 1/4 inch thick.
- Place the tiles in the mortar, spacing them evenly apart. Use a rubber mallet to tap each tile into place. Allow the mortar to dry for 24 hours before grouting.
- Mix together grout according to package instructions.
Attach A Ledger Board
Install Kitchen Backsplash On Drywall is a relatively easy project that can be completed in a few hours. The first step is to attach a ledger board to the wall. This will provide a surface to attach the backsplash tiles.
Next, measure and cut the tiles to fit the space. Apply mortar to the back of each tile and press it firmly against the ledger board. Make sure all of the tiles are level and spaced evenly before allowing the mortar to set.
3. Create The Tile Layout
When tiling a kitchen backsplash, the layout is one of the most important aspects to consider. There are many different ways to lay out a backsplash, and the best way will depend on the size and shape of the tiles, as well as the pattern you want to create.
One popular layout option is to create a diamond pattern with two different colors of tile. To do this, start by deciding where the center of your backsplash will be. Then, draw two lines intersecting in the center to create four equal squares. Working from the center out, place a tile in each square. Once all four tiles are in place, add tiles around the outside of the diamond using either of the two colors.
Set Starting And Endpoints
Installing a kitchen backsplash can be a daunting task. It is important to set starting and endpoints so that the job goes smoothly. Here are the steps to install a kitchen backsplash on drywall:
- Measure the area and sketch out the design for the backsplash. This will help determine how much time is needed.
- Purchase the tile and adhesive. Make sure to get enough adhesive for the entire project.
- Remove any outlets or light fixtures from the wall where the backsplash will be installed.
- Apply adhesive to the wall and then place tiles in place. Use a level to make sure they are straight.
- Let the adhesive completely dry totally before attaching outlets or light fixtures back to the wall.
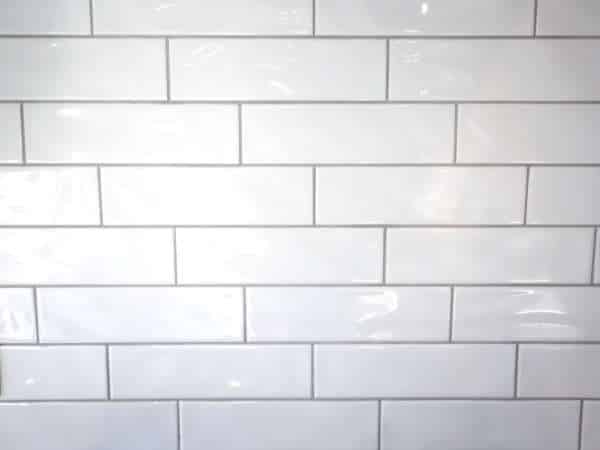
Plan The Horizontal Tile Design
When it comes time to install a kitchen backsplash, the decisions seem endless. Do you want subway tile or traditional ceramic tile? Glossy or matte finish? In this article, we’ll focus on one specific decision: horizontal or vertical tile layout.
Vertical tile layouts are popular because they make a small kitchen feel taller and more spacious. However, if your backsplash is on a drywall surface, it’s important to plan your layout carefully to avoid any unsightly gaps between tiles. Here are a few tips:
Start by measuring the width of your backsplash area and dividing it by the width of the tiles you’ve chosen. This will give you the number of rows you’ll need. Then measure the height of the area and divide that by the height of the tiles. This will tell you how many tiles high each row should be.
Plan The Vertical Tile Design
When you are Install Kitchen Backsplash On Drywall, it is important to plan the vertical tile design. You want to create a pattern or layout that looks intentional and not like you just slapped the tiles up on the wall. One way to do this is by using a tile grid.
A tile grid is simply a guide that helps you place your tiles in a consistent pattern. You can make your own grid by drawing a diagram of the layout on graph paper, or you can buy a pre-made grid from your home improvement store.
Once you have your grid, it’s time to start tiling! Begin by laying out your first row of tiles along the bottom edge of the wall. Then use your grid to line up the tiles in each row above it.
Cut Tiles
Installing a kitchen backsplash may be a frightening challenge. It may be particularly challenging in case you are operating with drywall. In this text, we are able to show you a way to cut and set up tiles on drywall.
The first step is to degree the backsplash location and decide what number of tiles you’ll want. Next, mark the tiles with a pencil and reduce them with a tile cutter or a wet noticed.
Once the tiles are cut, unfold skinny-set mortar at the wall using a trowel. Then, vicinity the tiles within the mortar and press them into area. Let the mortar dry for 24 hours earlier than grouting.
4. Tile The Backsplash
Install Kitchen Backsplash On Drywall is a simple process that can be completed in just a few hours. First, measure the area where the backsplash will be installed and purchase the appropriate amount of tile. Next, use a level to mark the placement of the tiles on the wall. Once the tiles are marked, use a tile cutter or a sharp knife to cut them to size. Apply mortar to the back of each tile and press them firmly against the wall. Let the mortar dry for 24 hours before painting or grouting.
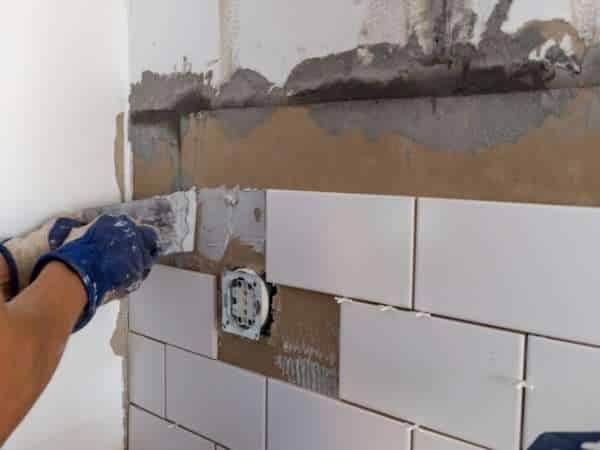
Apply Adhesive To The Wall
Installing a kitchen backsplash on drywall is a simple project that can be completed in a day. First, remove the old backsplash and any old adhesive with a pry bar. Clean the surface of the drywall and allow it to dry completely. Apply glue to the back of the tiles and press them into place. Let the adhesive dry for 24 hours before grouting.
Lay Tile
There are a few ways to install tile in your home. One way is to use mortar and place the tiles directly on the wall or floor. This is a more traditional way to install tile, and it can be hard work. A quicker, easier way to install tiles is to use adhesive and attach the tiles to a substrate such as drywall.
If you’re installing tile in a kitchen backsplash, it’s best to use adhesive and attach the tiles to drywall. First, measure the area that you want to tile and mark the dimensions on the drywall. Cut out the section of drywall using a utility knife. Apply glue to the back of each tile and press them into place on the wall. Let the adhesive completely dry totally before grouting.
Pre-Seal Tile
Installing a kitchen backsplash may be a excellent manner to feature some personality and color in your cooking space. There are many substances you may pick out from, however among one of the maximum popular alternatives is tile. Before you begin tiling, but, there are some things you want to do to prepare.
First, cast off any vintage backsplash material and clean the floor thoroughly. If the surface is drywall, you’ll also want to seal it. Apply a coat of primer to the drywall and permit it absolutely dry totally before shifting directly to the following step.
Once the primer is dry, you may start tiling. Start through measuring the place and reducing tiles to size with a moist noticed. When installing tiles round retailers or other fixtures, make sure you depart enough space for grout lines.
5. Grout Tiles And Finish
A tile backsplash is a remarkable manner to add shade and character for your kitchen. But, grout can be a task. Here are some pointers for installing a kitchen backsplash on drywall:
- Decide on the format of your backsplash and mark the position of every tile with a pencil.
- Spread thin-set mortar over the surface of the wall using a notched trowel. Be sure to fill in all of the cracks among the tiles.
- Place the tiles in role and press them into the mortar. Make positive that each tile is degree earlier than moving directly to the following one.
- Allow the mortar to dry for 24 hours before grouting the tiles.
- Mix up a few grout according to bundle guidelines and unfold it over the tiles using a rubber grout glide.
Prepare Grout
Installing a kitchen backsplash is a top notch approach to include a few persona and man or woman in your cooking area. There are many one-of-a-kind materials you may make use of for your backsplash, but amongst one of the most famous options is grout. Cement is a form of mortar that is utilized to fill within the areas between tiles. It comes in loads of shades, and it can be textured or easy.
Before you may install your kitchen backsplash, you need to prepare the grout. This method blending the cement with water till it reaches a thick consistency. You can even need to use a sealant to the grout as soon as it has dried. This will assist guard it from staining and fading. Once the grout is ready, you may start installing your backsplash.
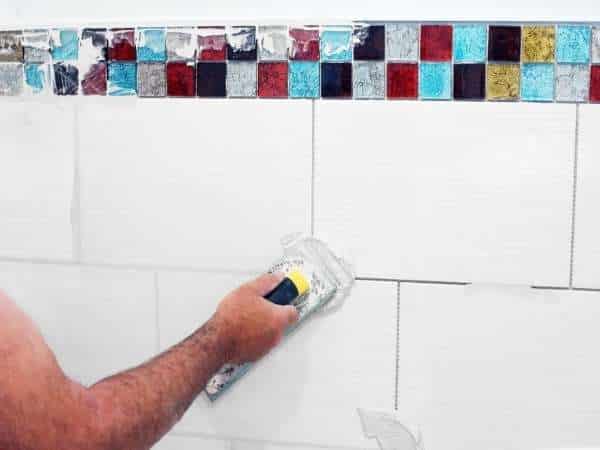
Apply The Grout
If you have decided to install a kitchen backsplash on your own, one of the first things you will need to do is apply the grout. This can be a daunting task, but if you follow these simple steps, you will be able to get the job done quickly and easily.
- Begin by mixing the grout according to the instructions on the package.
- Apply it to the backsplash using a grout float. Be sure to spread it evenly and press it into the gaps between tiles.
- Let the grout dry for about an hour, then use a damp sponge to remove any excess.
- Allow the grout to cure for 24 hours before applying sealant.
Seal The Grout
Installing a kitchen backsplash can be a a laugh and easy project. There are many options When it involves substances, but among one of the maximum famous is tile. If you are putting in your backsplash on drywall, you will want to seal the grout before it dries. Cement is a porous fabric and will take in water and stains if not sealed.
Be positive to study the commands carefully and comply with all safety precautions. This will assist shield your funding and hold your kitchen searching stunning for future years!
Fill The Expansion Gaps
Install Kitchen Backsplash On Drywall is a quick and easy way to add some character to your kitchen. There are many different materials you can utilize for a backsplash, but a tile is a popular option because it’s durable and easy to clean. If you’re handy with a drill and a level, you can install a tile backsplash yourself in just a few hours.
The first step is to measure the area you want to cover with the tiles. You’ll need to purchase enough tiles to cover the entire area, plus an extra few inches on each side so that you can cut them to size. Next, mark the location of each tile on the wall using a level and pencil.
6. Plan The Tile Layout

Installing a kitchen backsplash is a terrific approach to encompass personality and fashion for your cooking place. But before you may installation your new backsplash, you need to devise the layout. Here are a few pointers to help you get started:
- Decide at the appearance you need. Do you need a conventional backsplash with ceramic tiles, or some thing greater modern with metal or glass?
- Measure your partitions and make certain you’ve got sufficient tiles for the undertaking. You’ll additionally need to shop for adhesive and grout, if essential.
- Sketch out the format on paper earlier than starting to tile. This will assist make certain that the entirety goes collectively nicely.
- Start tiling inside the center of the wall and paintings your way outwards, using spacers as needed.
7. Instructions

Installing a kitchen backsplash is a wonderful method to include personality and style to your cooking space. While it may seem like a daunting task, it’s actually quite simple—especially if you’re working with drywall. Here are the steps you need to take:
- Decide on the design of your backsplash. This can be anything from a simple tile pattern to a more elaborate design involving multiple types of tiles and textures.
- Measure the area where your backsplash will go and purchase the appropriate amount of tile. You’ll also need tile adhesive, grout, and sealant.
- Prep the surface by removing any old paint or wallpaper and cleaning the area thoroughly.
- Apply the adhesive to the wall, then place the tiles in place and press them firmly against the adhesive.
8. Attach The Tiles
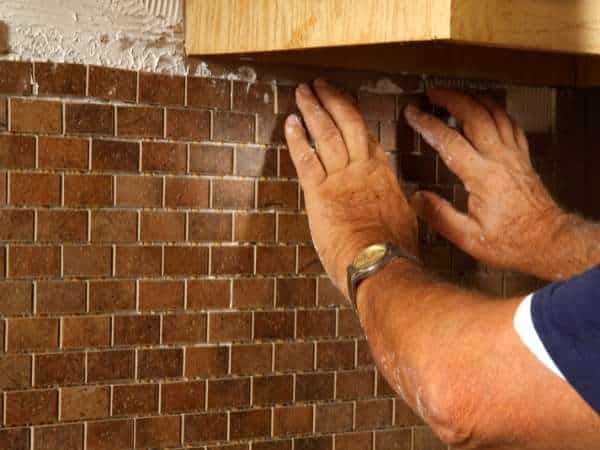
Installing a tile backsplash is a great manner to feature a few personality and individual to your kitchen. It can also be a remarkable manner to hide any unpleasant areas or maintenance. The procedure of installing a tile backsplash isn’t hard, however it may be time-consuming. If you are unexpected with the process, it is quality to rent a professional.
The first step in installing a tile backsplash is to connect the tiles to the wall. You will need to degree the area and purchase sufficient tiles to cover it. You will even want to buy adhesive and grout. Be sure to study the instructions on the adhesive and grout earlier than starting the venture.
Once you have the entirety you need, start by means of attaching the tiles to the wall. Use a stage to ensure they may be directly.
9. DIY Level: Intermediate To Install Or Repair A Drywall
Install Kitchen Backsplash On Drywall is a project that can be completed by an intermediate do-it-yourselfer. The most important part of the project is making sure the surface is prepared properly. The surface should be clean and free of any dust or debris. If there are any holes or cracks in the drywall, they will need to be fixed before beginning the project.
Once the surface is prepared, the backsplash can be installed. There are a few different methods that can be used, but the most common is to use of adhesive tape. First, measure the area where the backsplash will be installed and cut the tile to size. Apply glue to the back of each tile and attach it to the wall. Once all of the tiles have been attached, let them dry for 24 hours before using them.
10. Materials You’ll Need to Install Or Repair Drywall
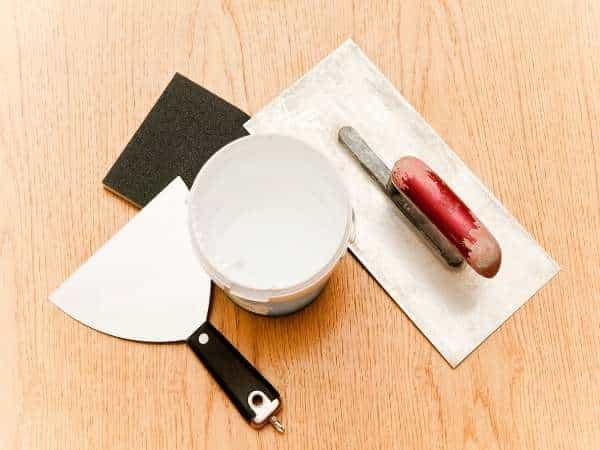
Installing a kitchen backsplash on drywall is a relatively easy task that can be completed in a few hours. The materials you’ll need for the project include:
- Tape measure
- level
- Marker
- Pencil
- Drywall saw
- Utility knife
- Square
- Chisel
- Hammer
- Sandpaper (medium grit)
- Safety glasses
- Dust mask
Draw a level line on the wall using a marker and pencil. Cut the drywall using a drywall saw. If there are any electrical outlets or switches in the way, cut out them using a utility knife. Square off the edges of the hole using a square and chisel.
11. How To Install Or Repair Drywall?
Installing a kitchen backsplash on drywall is a great way to add some personality and color to your cooking space. It’s also a relatively simple project that you can do yourself with a few basic tools. Here are the steps you need to take:
- Measure the area where you want to install the backsplash and purchase the appropriate amount of tile.
- Spread a layer of thin-set mortar over the surface of the wall using a trowel, then press the tiles into place.
- Apply grout between the tiles using a grout float, then wipe away any excess grout with a damp cloth.
- Let the grout dry for 24 hours, then seal it with an acrylic sealer.
See More: How To Organize Kitchen Utensils
Conclusion
Install Kitchen Backsplash On Drywall is a relatively simple process that can be completed in a few hours. By following the steps outlined in this article, you can create a beautiful and functional backsplash for your kitchen.