How To Vent A Bathroom Fan Through The Wall. A bathroom fan can be a nuisance when it’s blowing air into your bedroom at night. If the fan is mounted near the wall, you can try to vent it through the wall. You may need to remove some drywall or use a hole saw to make a small opening. Be sure to seal the opening well with caulk or silicone.
1. Bathroom Exhaust Fan Venting Options
When it comes to bathroom ventilation, there are a few different options to consider. One popular option is venting the fan through the wall. This option has a few benefits, including:
The biggest benefit of venting a bathroom fan through the wall is that it eliminates the need for a duct system. This can be especially helpful in older homes, where it can be difficult to find space for a duct system. Additionally, by venting the fan through the wall, you can help keep moisture and humidity under control in your bathroom.
There are a few things you’ll need to consider when venting your bathroom fan through the wall. First, you’ll need to make sure that your home has an exterior wall that can be used for ventilation.
2. Ventilating Through The Roof
When installing a bathroom exhaust fan, one of the decisions you’ll have to make is how to vent it. The most common methods are through the roof or through the wall.
If your home has a pitched roof, venting through the roof is a simple process. All you need is a roof vent and some flashing tape. The roof vent can be installed in minutes, and the flashing tape will ensure that the seal is watertight.
If your home has a flat roof, venting through the roof may not be an option. In this case, you’ll need to vent the fan through the wall. This can be done by drilling a hole in the wall and installing a fan hood. Be sure to use a fan hood that is approved for use with bathroom exhaust fans.
Standard Roof Vents
When it comes to bathroom ventilation, you have a few different options. The most common way to vent a bathroom fan is through the roof. This can be done by installing a standard roof vent. If your fan is already installed, you can purchase a roof vent kit to do the job.
Another option is to vent the fan through the wall. This can be done by installing a bathroom exhaust fan with an internal damper. When the fan is not in use, the damper will close and keep the warm air in during the winter months.
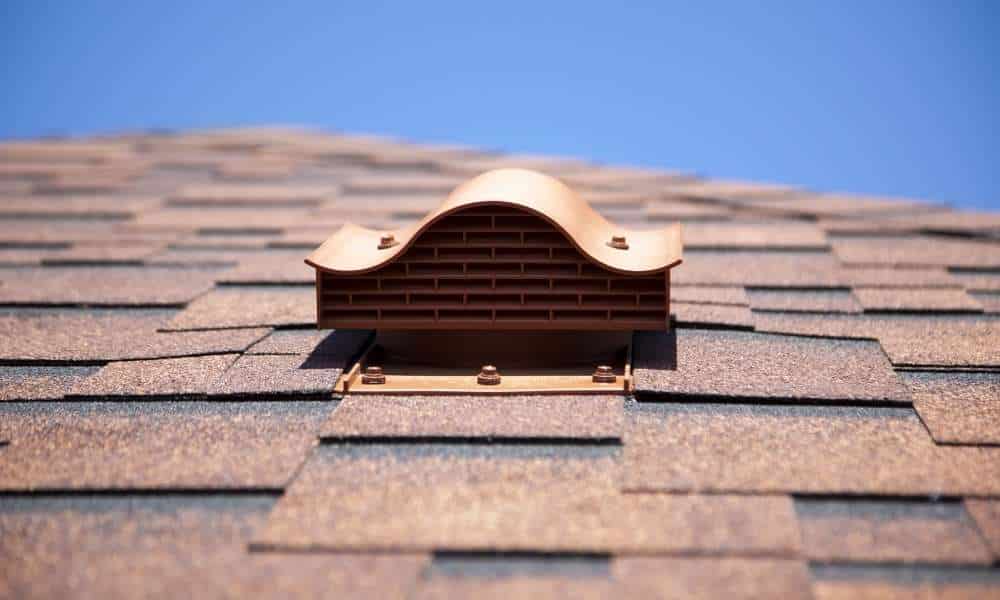
How To Vent Through A Shingled Roof
If you are looking to install a bathroom fan, you may be wondering how to vent it through the roof. This is a common question, as many people want to make sure their fan is installed properly and is working as efficiently as possible. The good news is that venting a bathroom fan through the roof is actually quite easy, and can be done in just a few simple steps.
To begin, you will need to measure the height of your roof and purchase a vent that is the appropriate size. Once you have the vent, you will need to cut an opening in the roof for it to fit through. Be sure to use a weatherproof sealant around the edges of the opening to keep water from seeping in.
How To Vent Through A Metal Roof
Installing a bathroom exhaust fan is a great way to remove moisture and odor from the room. However, if the fan is not installed properly, it can actually increase the moisture levels and cause damage to your home.
One of the most common mistakes people make when installing a bathroom exhaust fan is venting it through the roof. This can cause moisture and condensation to build up in the attic, which can lead to mold and mildew growth, as well as damage to the roofing materials.
A better option is to vent the fan through a wall. This will allow the moist air to escape outdoors without causing any damage. In order to do this, you’ll need to install a special venting kit that includes a weatherproof hood and a duct that runs from the fan to the outside of your home.
3. Venting Bathroom Fan Through A Soffit
Installing a bathroom exhaust fan is a great way to improve air quality and keep your bathroom from getting too stuffy. But what if you don’t have an attic or the space to run the ductwork necessary to vent the fan through the roof? You can still install the fan, but you’ll need to vent it through a soffit.
The first step is to find the right spot to drill your hole. The soffit should be at least 12″ wide, so measure accordingly. Drill a hole in the soffit that’s big enough for the exhaust fan’s ducting, and then use a jigsaw to cut out a rectangular opening.
Pros of Venting Through Soffit Vents
Soffit vents provide a great way to vent bathroom fans and other exhaust systems. There are a few key benefits of venting through soffit vents.
1. Soffit vents provide an easy way to install exhaust systems. They are typically installed in the soffit or eave of a roof, making them easy to access and requiring minimal effort.
2. Soffit vents allow for a large amount of airflow, which is ideal for venting bathroom fans and other exhaust systems. The large surface area of the vents allows for plenty of airflows, helping to quickly remove moisture and fumes from the area.
3. Soffit vents are inconspicuous and can be easily hidden from view. This is ideal for those who want an unobtrusive ventilation system that doesn’t detract from the appearance of their home.
Cons Of Venting Through A Soffit Vent
There are a few reasons why venting a bathroom fan through the soffit vent may not be the best option. First, since the fan is located in the attic, it can be quite noisy and disruptive. Second, the fan may not be effective at removing moisture from the bathroom if it’s located too far away from the shower or bathtub. Finally, if there is no ventilation in the soffit vent, the warm moist air from the bathroom can escape into the attic, which can cause mold and mildew growth.
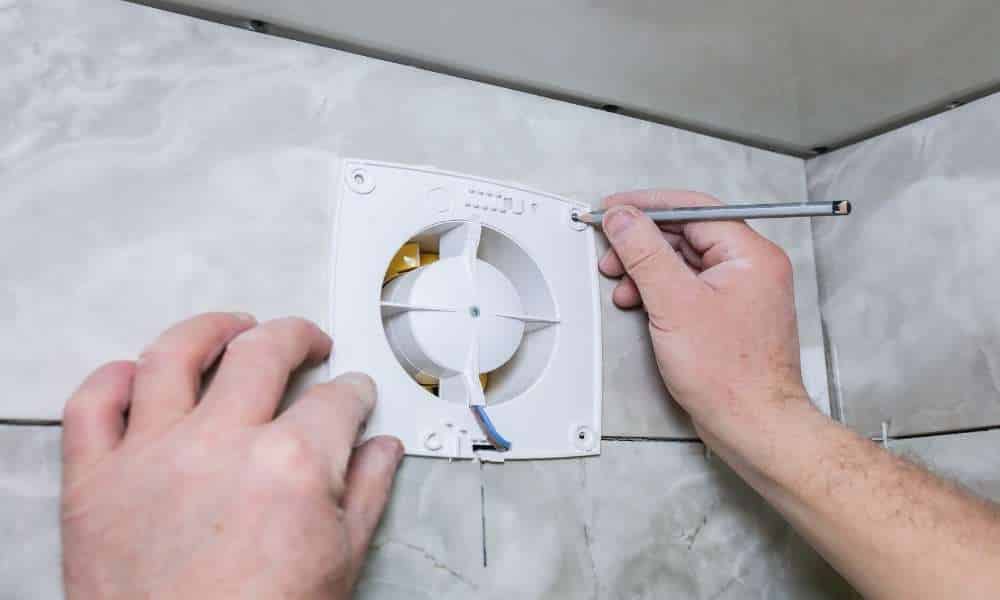
4. Ventilating Through A Wall
Installing a bathroom exhaust fan can help reduce moisture and mildew in your home. But what if you don’t have an exhaust fan opening in your bathroom? Or what if you want to move your exhaust fan to a different location? You can vent your bathroom fan through the wall by following these simple steps.
- Locate the studs in the wall where you want to install the vent.
- Cut a hole in the drywall that is large enough for the vent to fit through.
- Insert the vent into the hole and secure it in place with screws or nails.
- Run the duct from the vent to the location of your bathroom exhaust fan.
- Connect the duct to the exhaust fan and turn on the fan.
Ductwork To Wall Vent
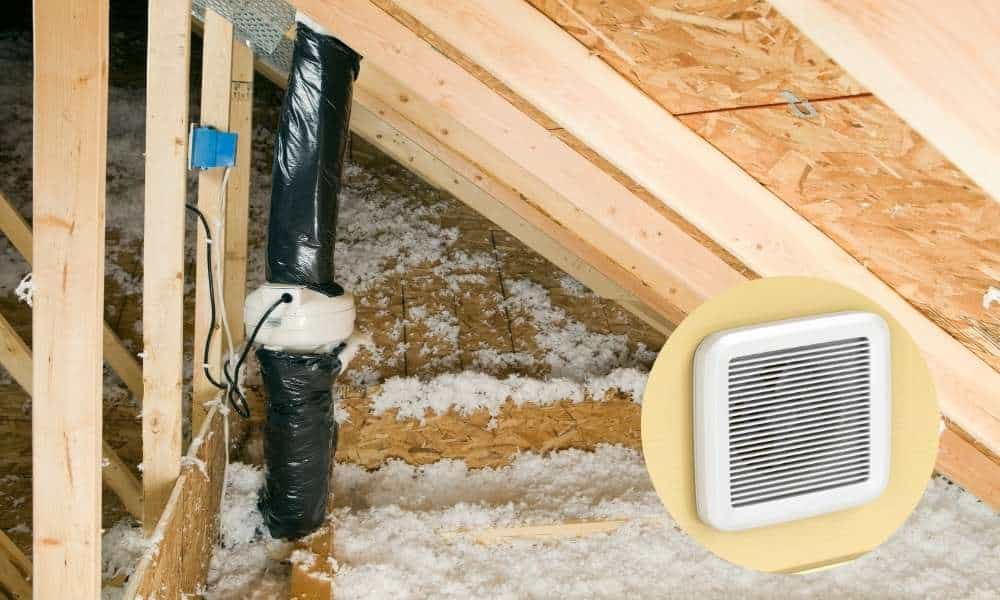
Installing a bathroom exhaust fan is a great way to remove moisture and pollutants from the air in your home. But where should you install the fan? In most cases, it’s best to vent the fan through the roof. However, if you don’t have enough room in your attic or if your home is too tightly sealed, you can also vent the fan through the wall.
When venting a bathroom fan through the wall, you’ll need to install ductwork between the fan and the wall. The ductwork should be made of metal or PVC pipe and should be at least 4 inches in diameter. The length of the ductwork will depend on how far away the wall is from the fan. Once you’ve installed the ductwork, it’s time to attach it to the fan and the wall.
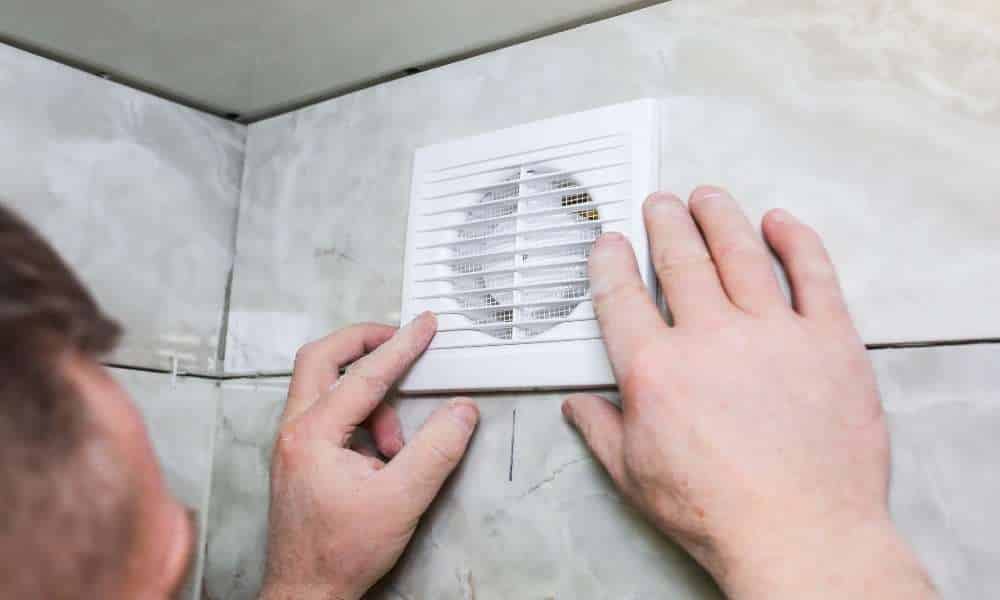
How To Vent Through A Wall
Installing a bathroom fan can help remove moisture and odor from the room. However, if the exhaust fan is located in the bathroom, it can be difficult to vent the fan through the wall. There are a few ways to vent a bathroom fan through the wall.
One way to vent a bathroom fan through the wall is to use a combination of ducts and fans. The exhaust fan can be installed in the bathroom and the duct can be run through the wall to an exterior location. This type of installation requires some carpentry skills and knowledge of home electrical wiring.
Another way to vent a bathroom fan through the wall is to use an inline duct booster fan. This type of fan can be installed between the exhaust fan and the duct that runs through the wall. The inline duct booster fan will help boost the airflow and will help move moist air out of the bathroom.
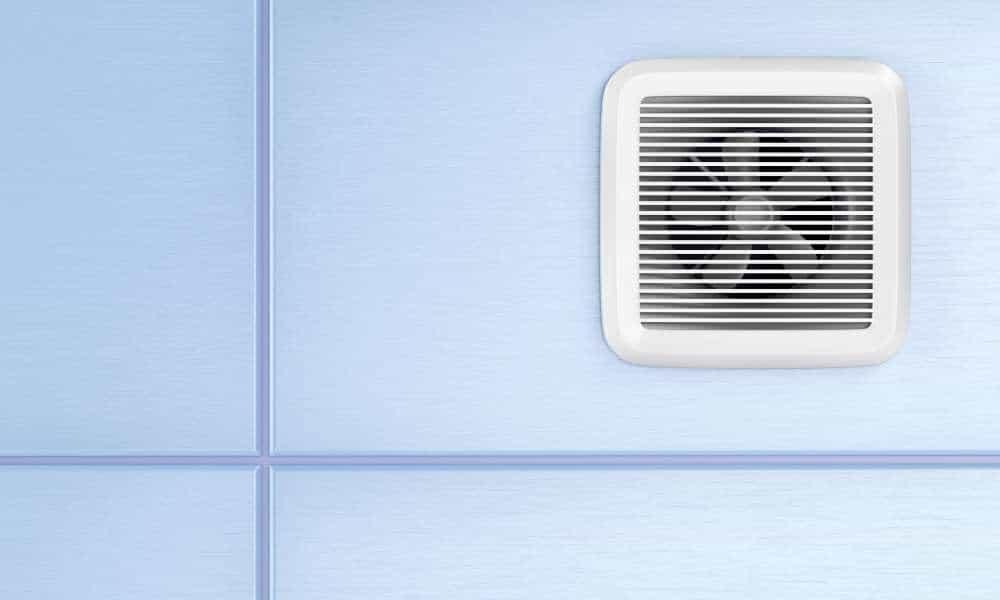
Direct-Discharge Exhaust Fan
Direct-discharge exhaust fans are installed in walls and allow the fan to discharge directly into the outside atmosphere. This is an easy way to vent a bathroom fan, and it doesn’t require any special skills or tools. The first step is to measure the dimensions of your fan opening and then purchase a direct-discharge exhaust fan that is the appropriate size.
Once you have the fan, use a saw to cut an opening in the wall near the roofline. The opening should be large enough for the fan to fit through, and it’s a good idea to make it a little bit larger than necessary so that you have some room to work. If you’re not comfortable using a saw, you can always hire a professional contractor to do this for you.
Installing A Direct-Discharge Exhaust Fan
Installing a direct-discharge exhaust fan is a great way to vent your bathroom without having to go through the roof. This type of fan installs directly through the wall, making it an easy and convenient option.
There are a few things you’ll need to do before you install your new fan, however. First, you’ll need to ensure an opening in the wall is large enough to accommodate the fan. You’ll also need to cut a hole in the roof for the exhaust pipe.
Once you’ve done that, it’s time to install the fan. Simply follow the instructions that come with your fan, and you should be good to go. Be sure to use caulk or silicone sealant around the edges of the hole in order to keep water from getting into your home.
Behind A Gable Vent
If you’re looking to install a bathroom fan, but don’t want to see or use the typical bathroom fan vent, you may want to consider venting your fan through the wall. This is a great way to hide the fan and also prevent it from getting wet. Here’s how to do it:
- Locate the studs in the wall where you want to place your fan.
- Mark the spot on each stud where you will drill your holes for the fan vents.
- Drill two large holes in each stud using a hole saw or jigsaw. The holes should be large enough for the fan vents to fit through.
- Fit the fan vents into the holes and screw them in place using the included screws.
- Connect the ducting between the fan and the vent outside of your home.
Venting Under The Floor
Installing a bathroom exhaust fan is a great way to improve the air quality in your home. Not only will it remove moisture and humidity from the air, it will also help to get rid of any unpleasant smells. But before you can install your fan, you need to make sure that there is an adequate ventilation system in place.
One option is to vent the fan through the wall. This can be done by installing a vent pipe through the roof or by cutting a hole in the side of the house. If you choose to go with the latter option, make sure that you install a weatherproof cover to keep out rain and snow.
Another option is to vent the fan through the floor. This can be done by installing a vent pipe in the crawl space or basement and running it up through the floor.
5. Use Proper Ductwork
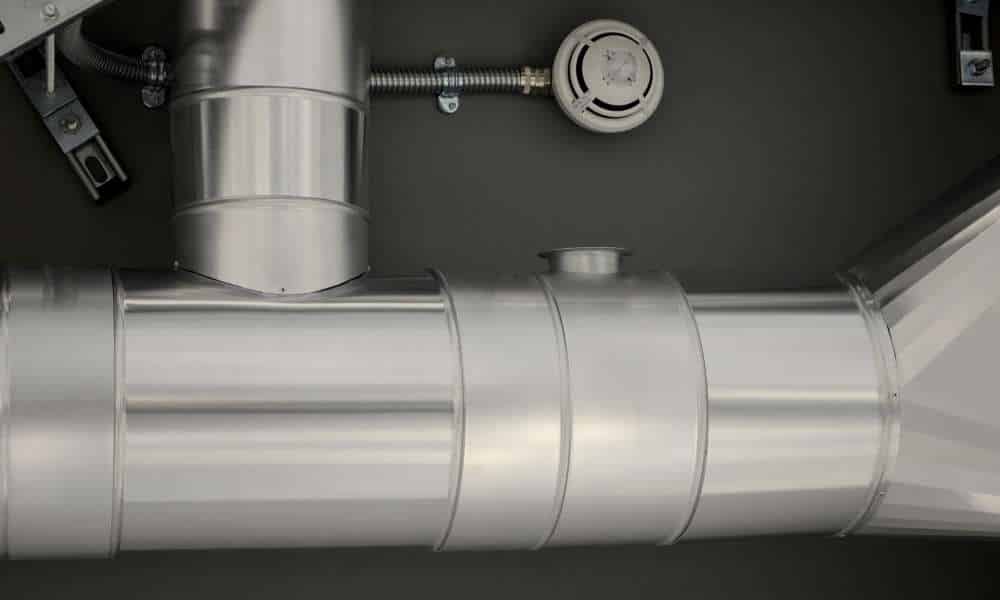
Venting a bathroom fan through the wall is a great way to keep your bathroom smelling fresh. It’s also a good way to keep the humidity down in your bathroom. In order to vent a bathroom fan through the wall, you’ll need to use proper ductwork.
The first thing you’ll need to do is purchase some proper ductwork. You can find ductwork at most home improvement stores. When you’re selecting ductwork, be sure to choose one that is made for exhaust fans.
Once you have the proper ductwork, it’s time to install it. The installation process is fairly simple, and shouldn’t take too long. First, cut a hole in the wall where you want the fan to go. Then, attach the ducting to the fan and insert it into the hole in the wall.
6. Bathroom Exhaust Fan Placement
Installing a bathroom exhaust fan is a great way to remove moisture and humidity from the room, which can help prevent the growth of mold and mildew. When installing your fan, it’s important to place it in the correct location so that it can do its job properly. Here are a few tips on how to vent a bathroom fan through the wall:
- Make sure the fan is located near an exterior wall.
- The exhaust pipe should be as short as possible and should have no more than two elbows.
- The exhaust pipe should terminate outside, away from windows and doors.
- If possible, use a roof jack to extend the exhaust pipe up through the roof; this will help prevent rain from entering the exhaust pipe.
Conclusion
Venting a bathroom fan through the wall is a great way to improve air circulation and keep your bathroom smelling fresh. Following this article’s steps, you can install a fan vent yourself in just a few minutes.